There are times where we have to rely on non-unlimited data plan internet service when our main ISP is down or not available at the moment. In most cases, as the best internet connection backup, we would tether our iPhone or Android device and share its internet connection with our Windows 10 laptop or desktop PC via USB or WiFi.
However, since most mobile data plans have a limited data usage each month, you wouldn’t want to waste too much of your data usage on Windows 10 background services that are not needed while tethering. In Windows 10, you can also set a data limit to limit the data your Windows 10 can use in a set period of time so you wouldn’t use beyond that limit accidentally.
This short tutorial will show you how to limit data or restrict background data to help reduce data usage in Windows 11 or 10.
Page Contents
How to Limit Data Usage In Windows 11/10 While Tethering
The data limit tool is a built-in feature that comes with Windows 10 by default. You don’t have to install anything to limit data usage in Windows 10. Follow the steps below to set a data limit on your Windows 11/10 PC.
- Using the Windows 10 search bar, search for Settings and open it.
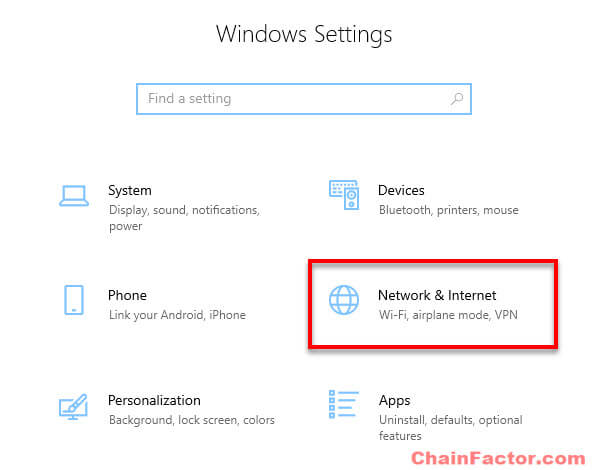
- Select Network & Internet.
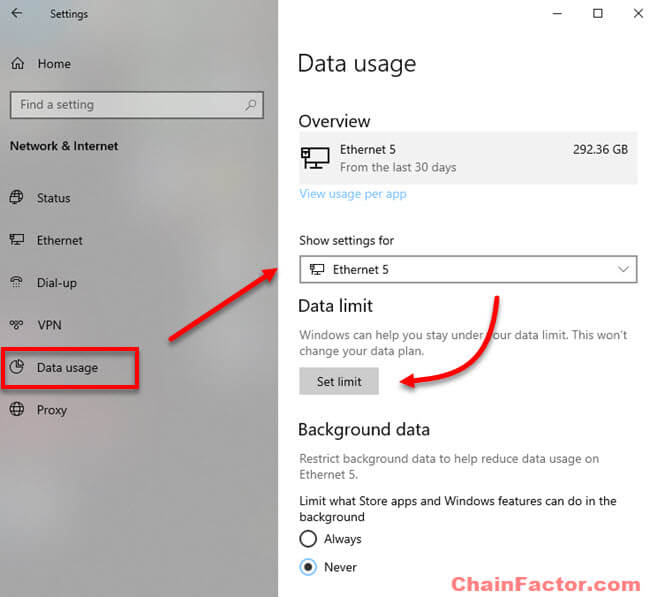
- On the left pane, select Data usage.
- Under “Show settings for” drop-down menu, select the wired or wireless network adapter that you want to set the limit on.
- Under “Data limit“, click on Set limit.
- Select the “Limit type” you want.
- Monthly – Data limit will refresh every month.
- One time – Manually set a time period until data limit expires.
- Unlimited – By default, it’ll be on unlimited.
- The second option will differ depending on what you choose for “limit type” earlier.
- If you choose Monthly, it’ll appear as Monthly reset date which allows you to select the day of each month that the data limit should reset.
- If you choose One time, it’ll appear as Days until data expires which lets you select how many days until this data limit expires.
- In the “Data limit” field, enter the amount of data that you want to limit and make sure to also choose the correct unit – GB or MB.
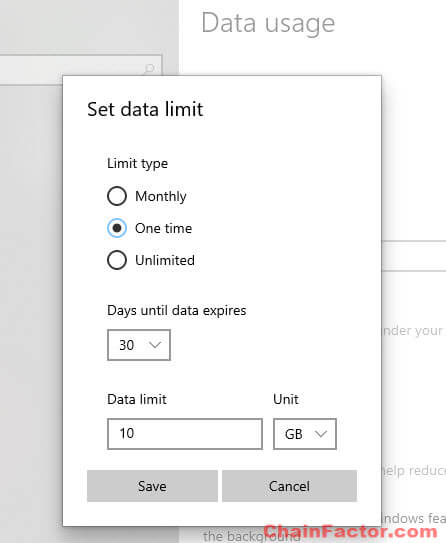
- Click Save.
After completing all the steps above to setting up a data limit, Windows 10 will start to monitor your data usage on your computer and will automatically stop your PC from using any more data when the data usage limit is reached.
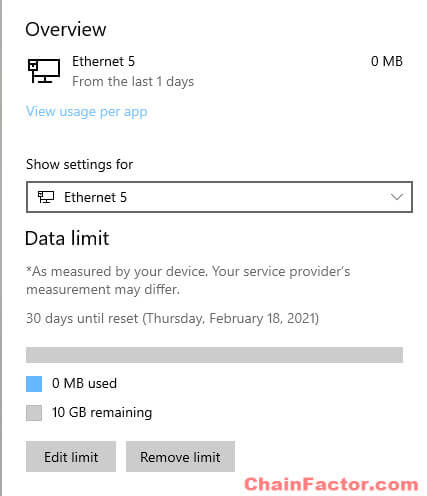
To remove the data limit you have set, click on the Remove limit button under data limit.
How to limit and restrict background data in Windows 10
Some background apps and services such as auto update, user experience sharing, etc, will consume data without you knowing. You can let Windows 10 to automatically restrict unnecessary background data to help reduce data usage in Windows 10.
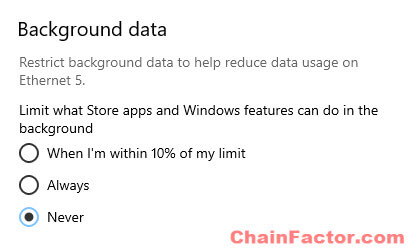
To limit background data in Windows 10, repeat step 1 to step 4 above. In “Background data” section, under “limit what Store apps and Windows features can do in the background”, select Always, or optionally, “When I’m within 10% of my limit” if you prefer to start restrict background data only when your data limit reaches 90%.
How to check and see data usage per app in Windows 10
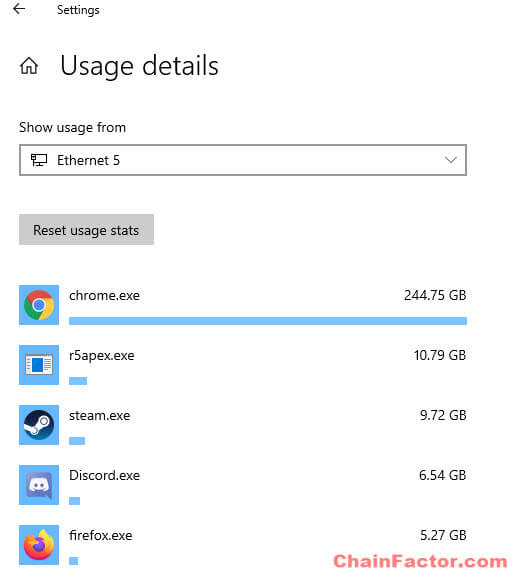
If you would like to check how many data were used by each of the apps in Windows 10, or which app consume to most data usage, in the same Data usage setting page, click on View usage per app.
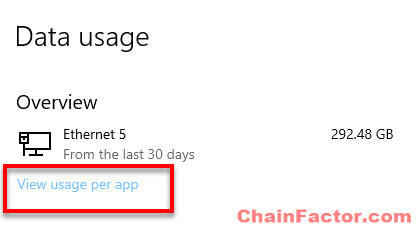
Here you can see a list of apps and their data usage sorting by amount of data used.
